
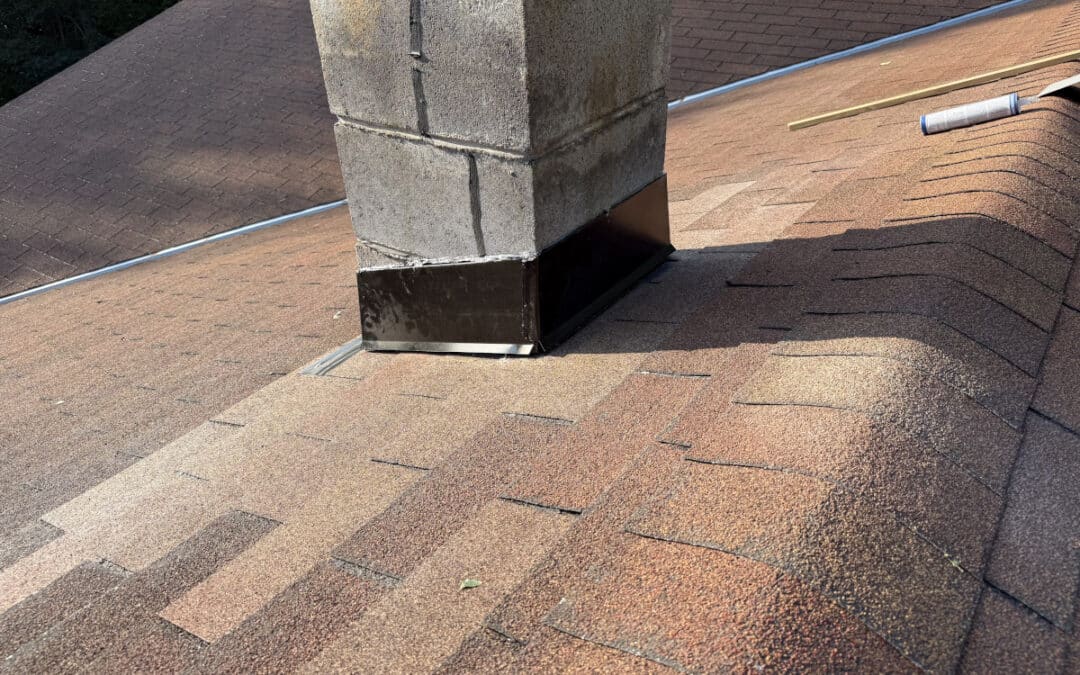
Water leaking around a chimney is a common roofing problem, but the source of the leak is not always the chimney itself. In many cases, the problem is the flashing system where the chimney meets the roof.
On this recent chimney flashing repair, water had been getting into the roof around the chimney. Correcting the problem required more than applying sealant over the existing flashing. The shingles surrounding the chimney were removed so the area could be properly rebuilt and protected against future water intrusion.
What Causes a Roof Leak Around a Chimney?
A chimney creates several transition points where roofing materials meet a vertical masonry surface. These areas need to be properly flashed to direct rain and melting snow away from the roof opening.
Chimney leaks can develop when:
- Flashing becomes damaged or deteriorated
- Step flashing was installed incorrectly
- Counter flashing is loose or no longer properly sealed
- Roofing materials around the chimney have deteriorated
- Previous repairs relied primarily on roofing cement or sealant
- Water is able to work its way behind the flashing system
Because water can travel beneath shingles and other roofing materials before becoming visible inside a home, the location of an interior water stain does not always reveal exactly where the roof is leaking.
How This Chimney Flashing Repair Was Completed
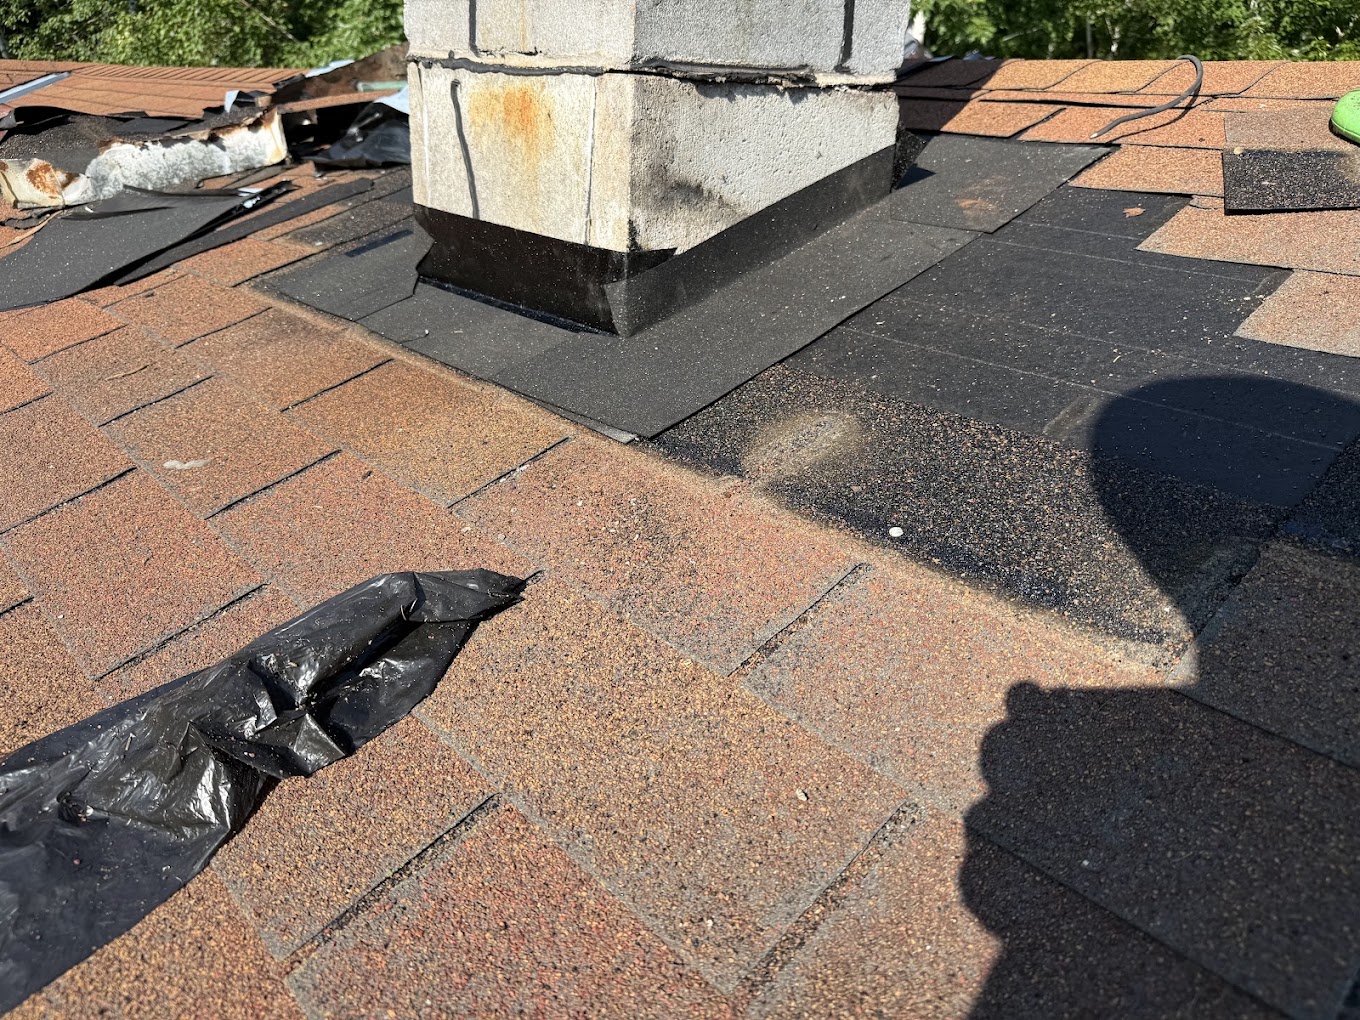
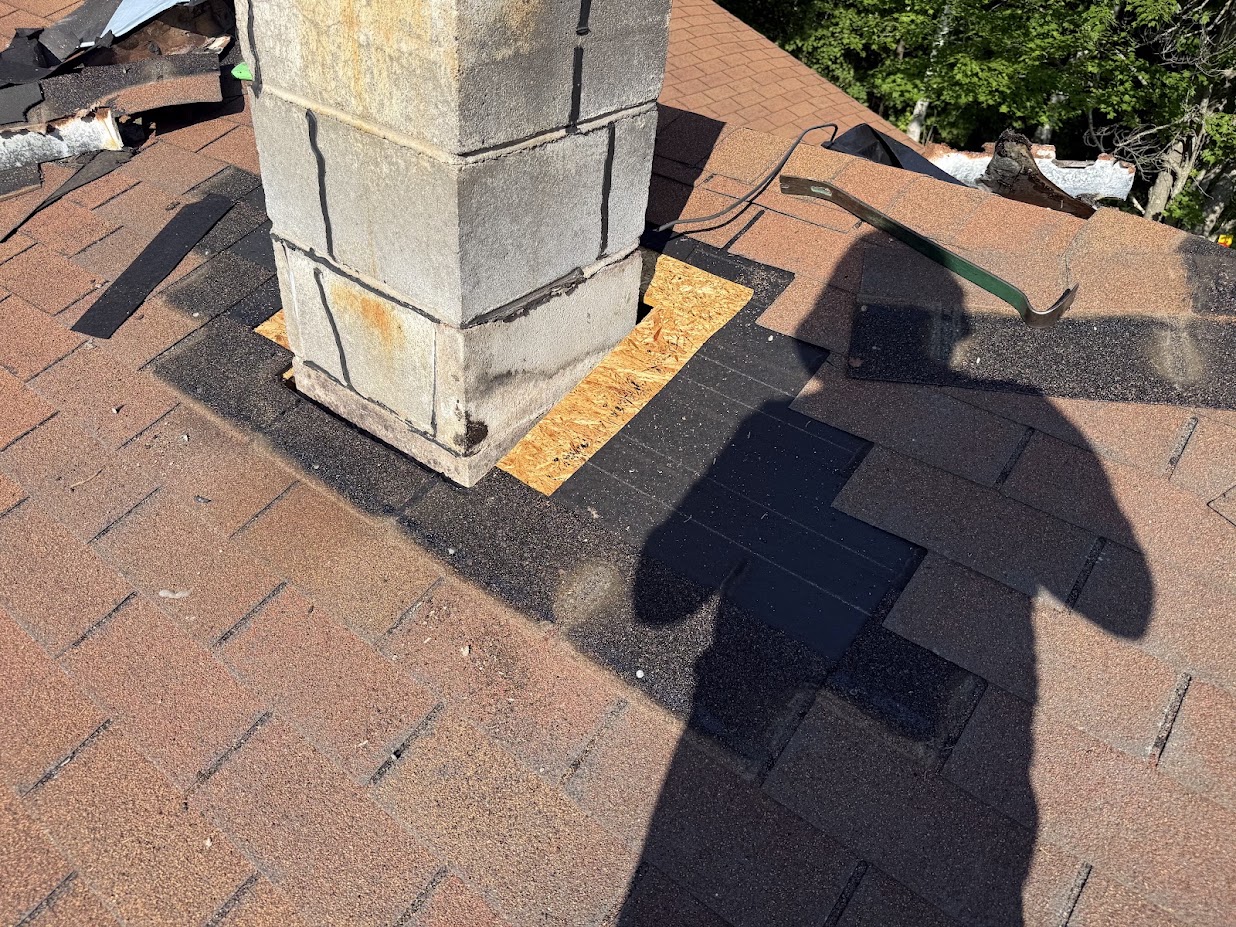
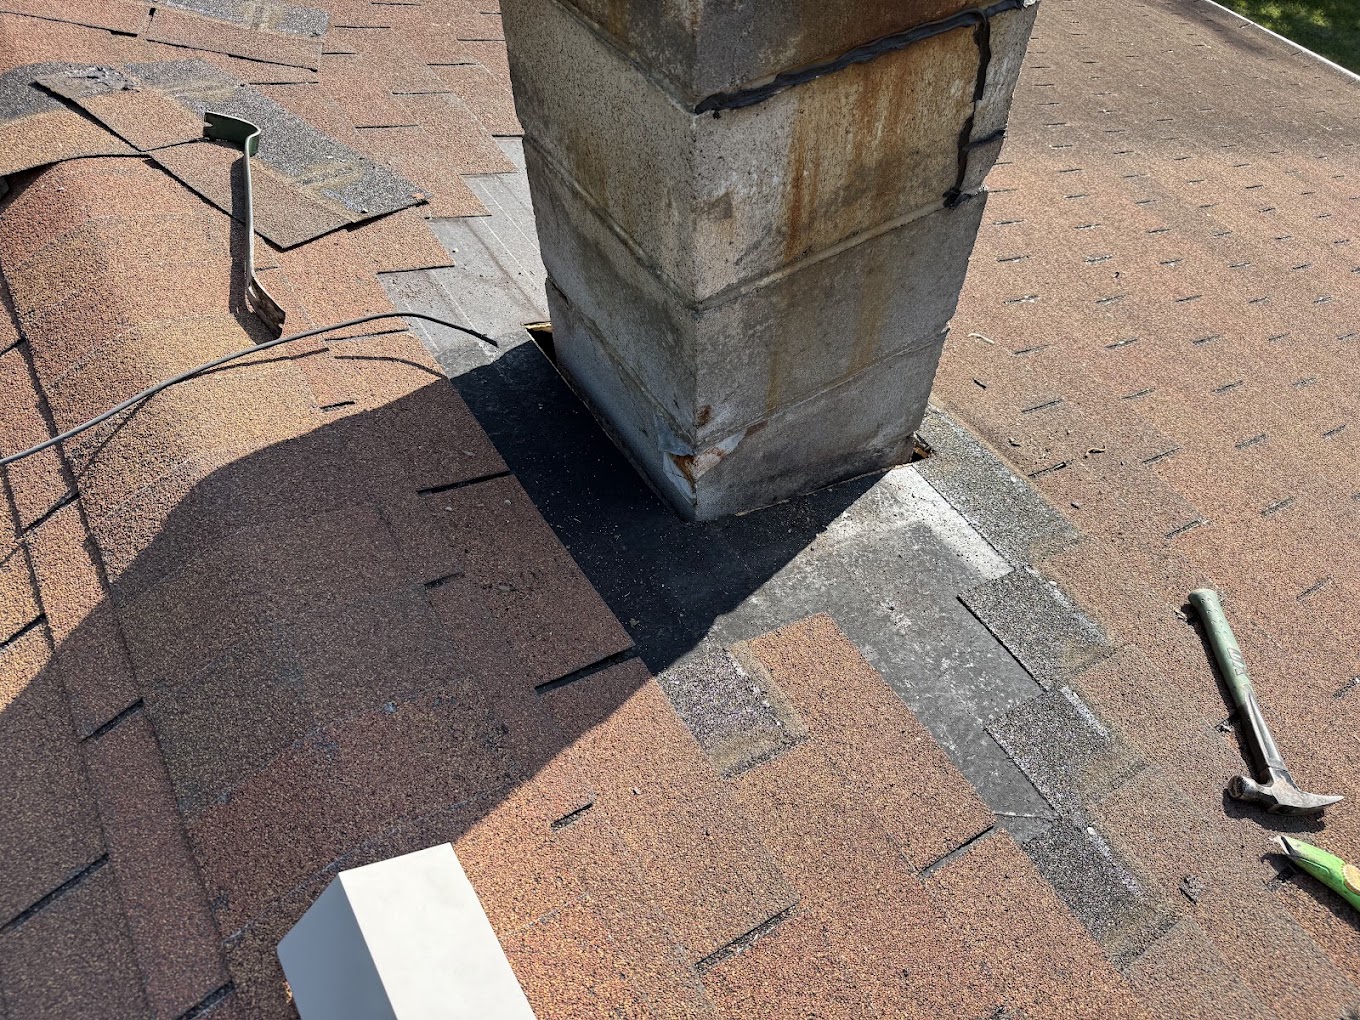
For this repair, the shingles surrounding the chimney were removed to expose the roof deck and existing flashing area. This allowed the roofing system around the chimney to be rebuilt rather than simply covering the problem.
1. Removing the Shingles Around the Chimney
The shingles immediately surrounding the chimney were carefully removed.
Opening the area provides access to the roof deck and allows the roofer to see how the existing flashing was installed. It also makes it possible to identify signs of water intrusion that may have been hidden beneath the shingles.
2. Installing Ice and Water Barrier
Ice and water barrier was installed around the chimney as an additional layer of protection beneath the roofing materials.
This self adhering membrane helps protect vulnerable roof penetrations and transition areas from moisture that may work beneath the shingles. This is particularly valuable on Minnesota roofs, where rain, snow, ice and repeated freeze and thaw cycles can put additional stress on roofing systems.
3. Installing Step Flashing
Step flashing was installed where the roof meets the sides of the chimney.
Rather than using one continuous piece of metal along the roofline, individual sections of step flashing work together with the shingles. Each piece overlaps the one below it, helping direct water down the roof instead of allowing it to enter the joint between the chimney and roofing system.
Proper integration between the shingles and step flashing is an important part of creating a reliable chimney flashing system.
4. Cutting a Reglet for the Chimney Flashing
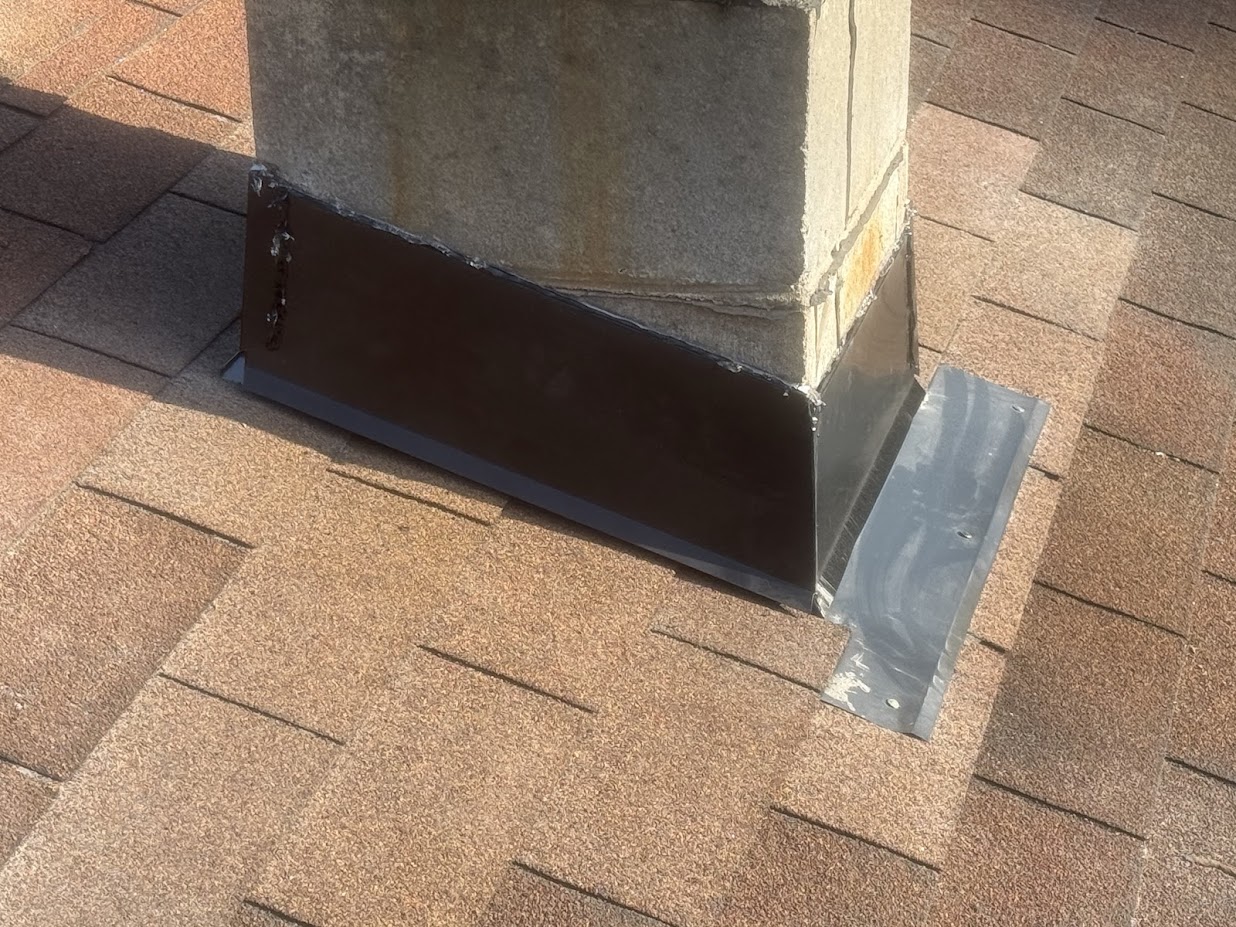
A reglet was ground into the chimney masonry so the new counter flashing could be properly integrated into the chimney.
A reglet is a groove cut into a masonry joint or surface that allows the upper edge of the counter flashing to be secured into the chimney rather than simply relying on surface applied sealant.
The counter flashing then overlaps the step flashing below it. Together, these components create a layered system designed to shed water away from the chimney and back onto the roof.
Why Proper Chimney Flashing Uses Multiple Layers
A reliable chimney flashing repair is not based on one material doing all the work.
The roofing shingles shed most of the water. Step flashing protects the intersection between the roof and chimney. Counter flashing protects the upper edge of the step flashing. Ice and water barrier provides another layer of protection underneath the finished roofing system.
Each component has a specific purpose.
This layered approach is one reason a properly rebuilt flashing system can be a better long term solution than repeatedly applying caulk or roofing cement to a leaking area.
Can You Just Seal a Leaking Chimney?
Sometimes a small flashing issue can be repaired without rebuilding the entire area, but sealant alone should not automatically be considered the solution to a chimney leak.
If the existing flashing is improperly installed, deteriorated or allowing water behind the roofing system, adding more sealant may only temporarily hide the underlying problem.
The appropriate repair depends on where the water is entering and the condition of the shingles, flashing, chimney and surrounding roofing materials.
Signs Your Chimney Flashing May Need Attention
Possible signs of a chimney flashing problem include:
- Water stains on ceilings or walls near the chimney
- Dampness in the attic around the chimney
- Visible gaps between flashing and masonry
- Loose, bent or rusted flashing
- Cracked or deteriorating sealant
- Missing or damaged shingles near the chimney
- Recurring leaks after previous repairs
If water appears around a chimney after rain or snowmelt, the roof and flashing should be inspected to determine where the moisture is entering before deciding how the area should be repaired.
Chimney Flashing and Minnesota Weather
Roof penetrations and transitions are especially important in Minnesota because roofing systems have to handle more than rainfall.
Snow accumulation, melting snow, ice and freeze and thaw cycles can expose weaknesses around chimneys and other roof penetrations. Water can also enter small openings and cause additional problems as conditions change throughout the season.
Proper flashing helps manage that water before it can reach the roof deck or interior of the home.
Repair the Source of the Leak, Not Just the Symptom
When a chimney is leaking, the goal should be to determine why water is entering and correct the roofing or flashing problem responsible for it.
For this repair, that meant removing the surrounding shingles, installing ice and water protection, properly integrating step flashing and cutting a reglet into the chimney for the new counter flashing.
The result is a flashing system designed to work with the roof to direct water away from one of its most vulnerable transition areas.
Need Help With a Roof Leak Around Your Chimney?
Revival Roofing provides roof repair and inspection services throughout the Brainerd Lakes Area and surrounding Central Minnesota communities.
If you are seeing water stains, moisture around a chimney or other signs of a roof leak, we can inspect the area, identify the likely source and recommend the appropriate repair.
Contact Revival Roofing to schedule a roof inspection or discuss a roof leak repair.
Frequently Asked Questions about Chimney Flashing
How do I know if my chimney flashing is leaking?
Common signs include water stains on ceilings or walls near the chimney, dampness in the attic, damaged or loose flashing, deteriorated sealant, or leaks that appear after rain or melting snow. Because water can travel beneath roofing materials, an inspection may be needed to identify the actual source.
Can chimney flashing be repaired without replacing the roof?
Yes. If the surrounding roof is in good condition and the problem is isolated to the chimney area, the shingles and flashing around the chimney can often be removed and repaired without replacing the entire roof. The appropriate repair depends on the condition of the roofing materials and flashing system.
What is step flashing around a chimney?
Step flashing consists of individual pieces of metal installed where the shingles meet the sides of a chimney. The pieces overlap with the shingles to help direct water down the roof and away from the joint between the roof and chimney.
What is a reglet in chimney flashing?
A reglet is a groove cut into the chimney masonry or mortar joint so counter flashing can be secured into the chimney. The counter flashing overlaps the step flashing below, helping prevent water from getting behind the flashing system.
Will caulk stop a chimney flashing leak?
Caulk or sealant may help with certain minor flashing issues, but it is not a substitute for properly installed flashing. If water is getting behind damaged or incorrectly installed flashing, the area may need to be opened and the flashing system repaired.